I'm sitting down with International Quilt Museum curator Carolyn Ducey tomorrow (Sunday, January 16) at 3:00 ET to discuss the work and life of...
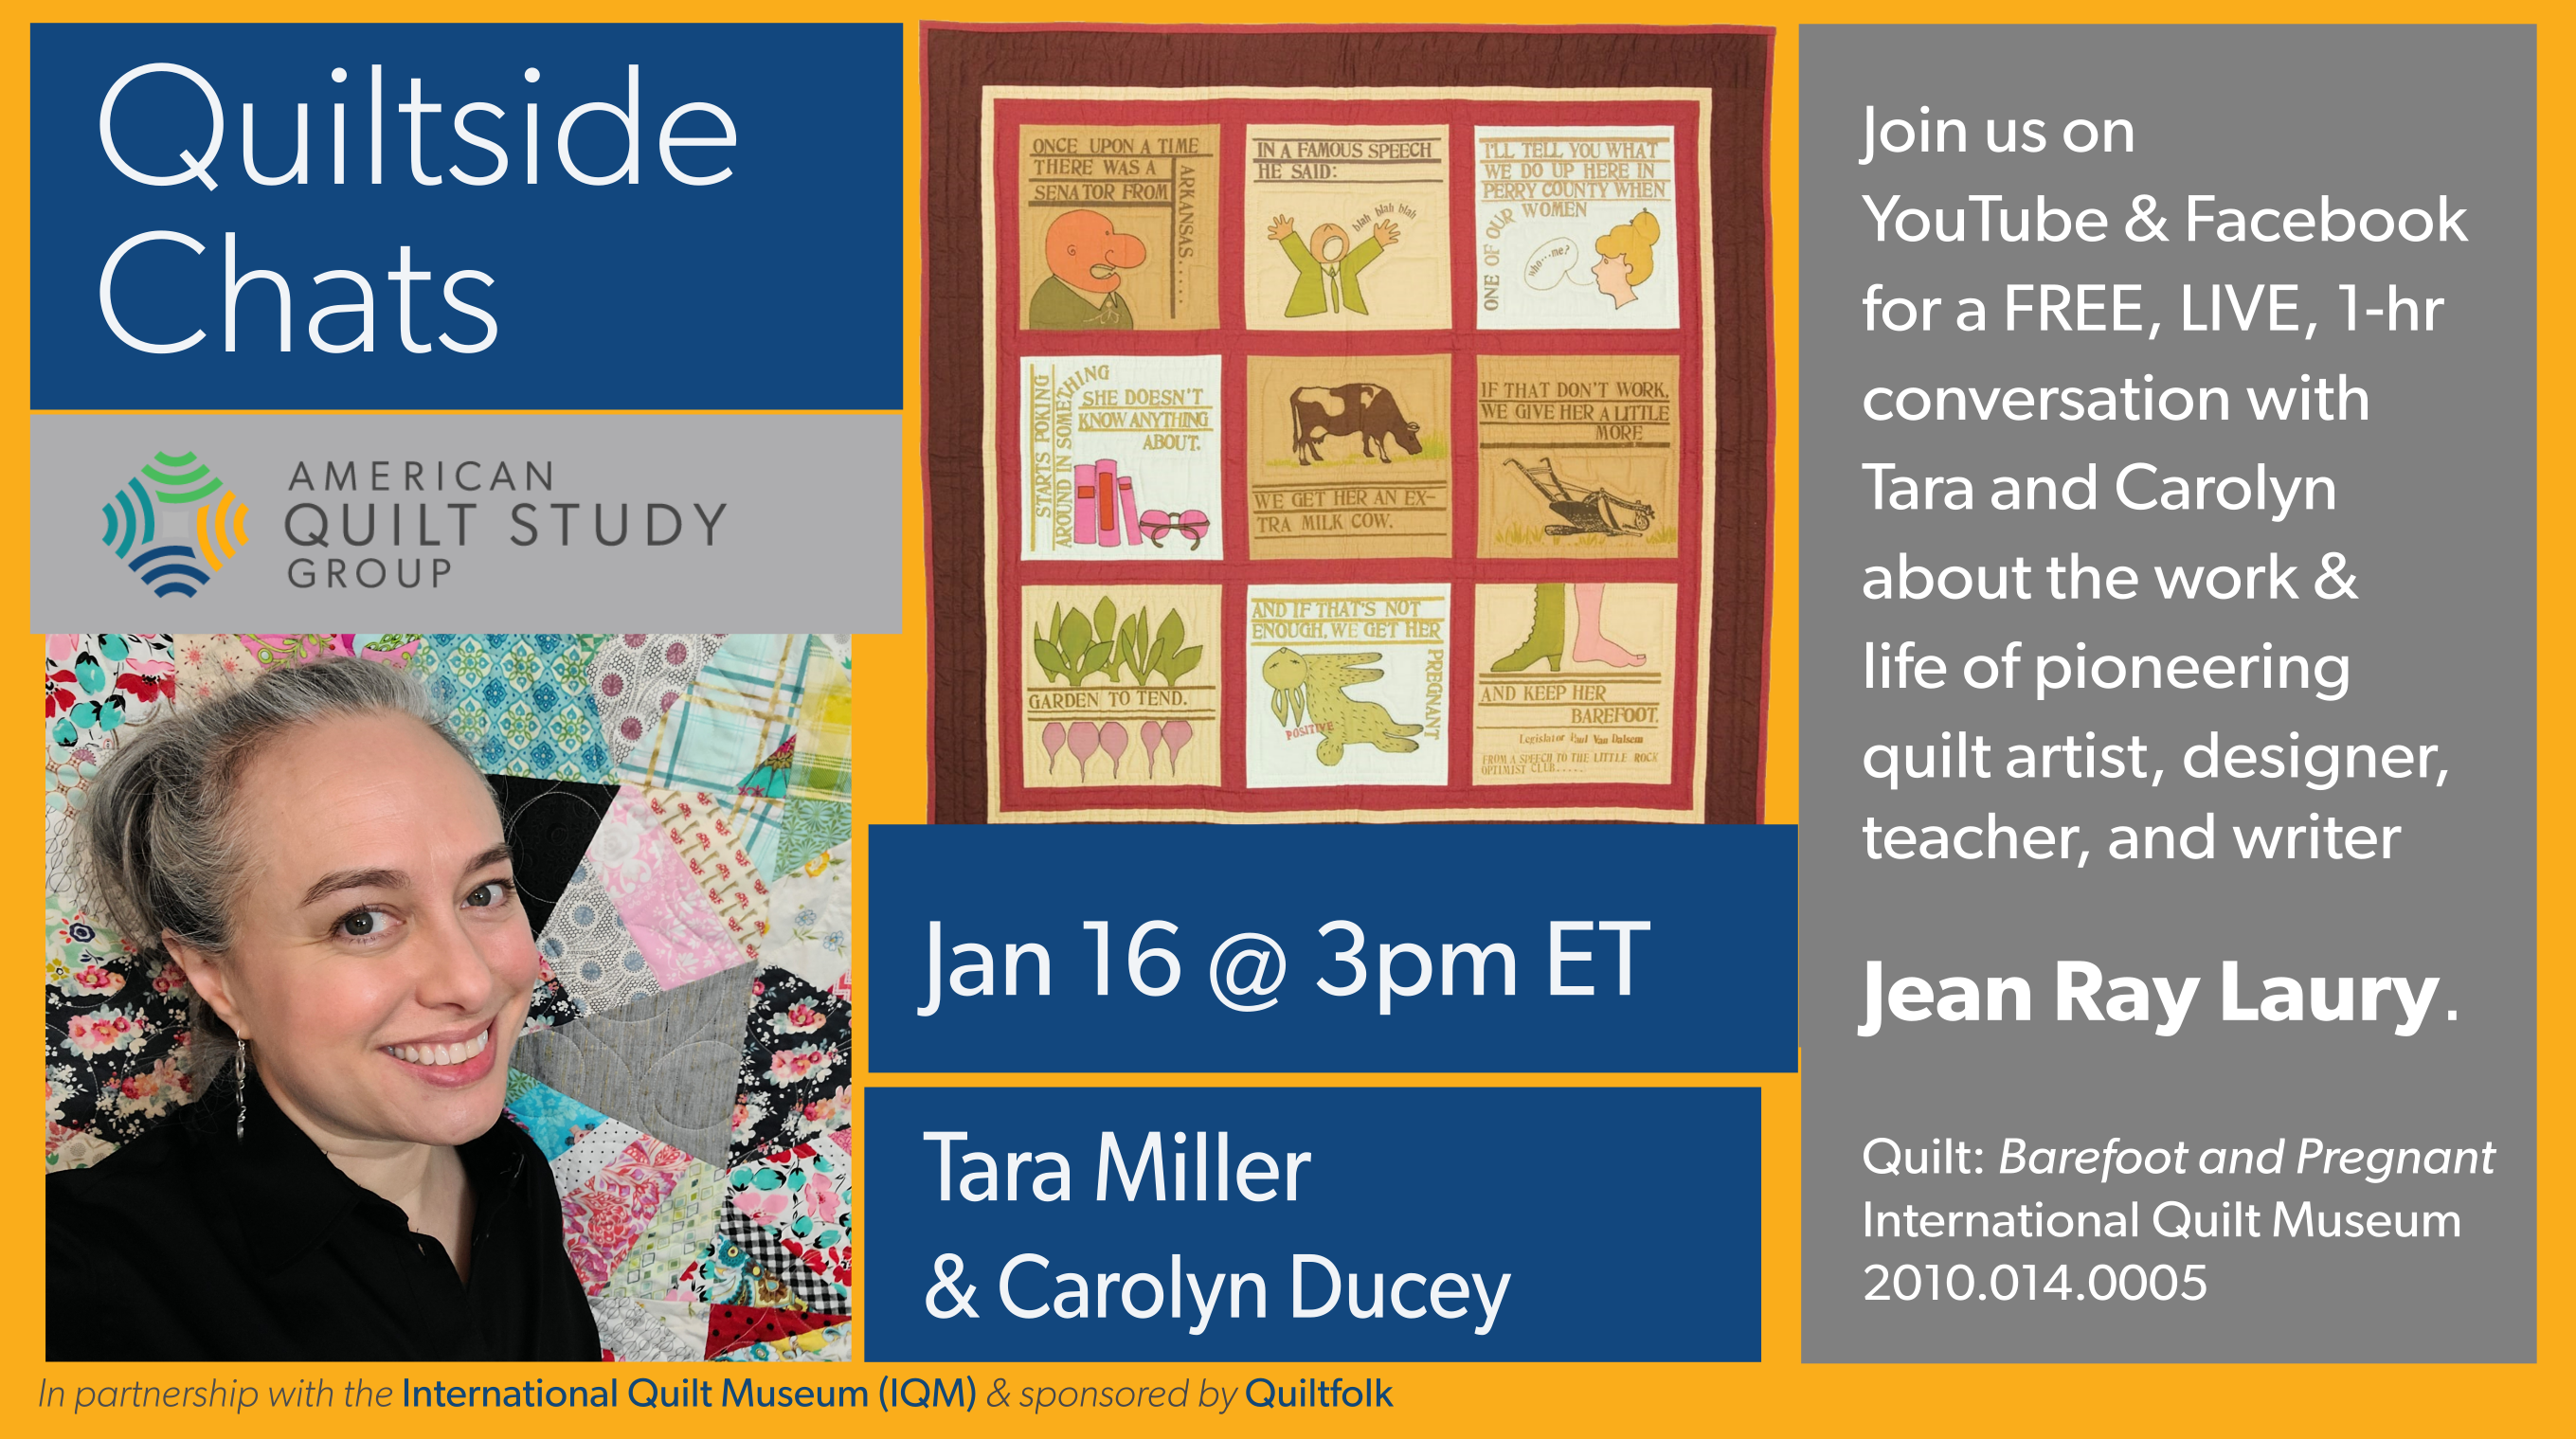
I'm sitting down with International Quilt Museum curator Carolyn Ducey tomorrow (Sunday, January 16) at 3:00 ET to discuss the work and life of...

I don't really know how to introduce this because it's just so insane. So I'm just going to spit it out: Last month, I had lunch with and spent the...

We like to use mostly cloth napkins around our house. Not because we're posh (Duchess Meghan hasn't returned my call), but because we like the...

I have moved into my new sewing space, and although it isn't finished, it HAD to get a design wall ASAP. I had making to do! After poking around the...

Happy New Year, Quiltabulous Friends! It's almost time for the Kaffe Fassett Mystery Quilt! Kaffe Fassett is the king of color. I had the pleasure...

You know those pinked (jagged) edges on precuts? I'm not a fan. Well, I get it, they keep the fabric from fraying, and that's obviously good. But...
I have always been pretty matchy-matchy but with Tara's insight I now feel so much more confident to mix things up.

Tara Miller
The Quilt District, LLC
Atlanta, GA, USA
I have always been pretty matchy-matchy but with Tara's insight I now feel so much more confident to mix things up.
Tara Miller
The Quilt District, LLC
Atlanta, GA, USA