How does your garden grow? Bountifully! Cheerfully! Hoorah!
Yo-yos might be the most forgiving hand sewing you’ll ever do. And they’re portable. Take these sweet little things along with you on the road for some get-your-mind-off-your-troubles sewing on the go.
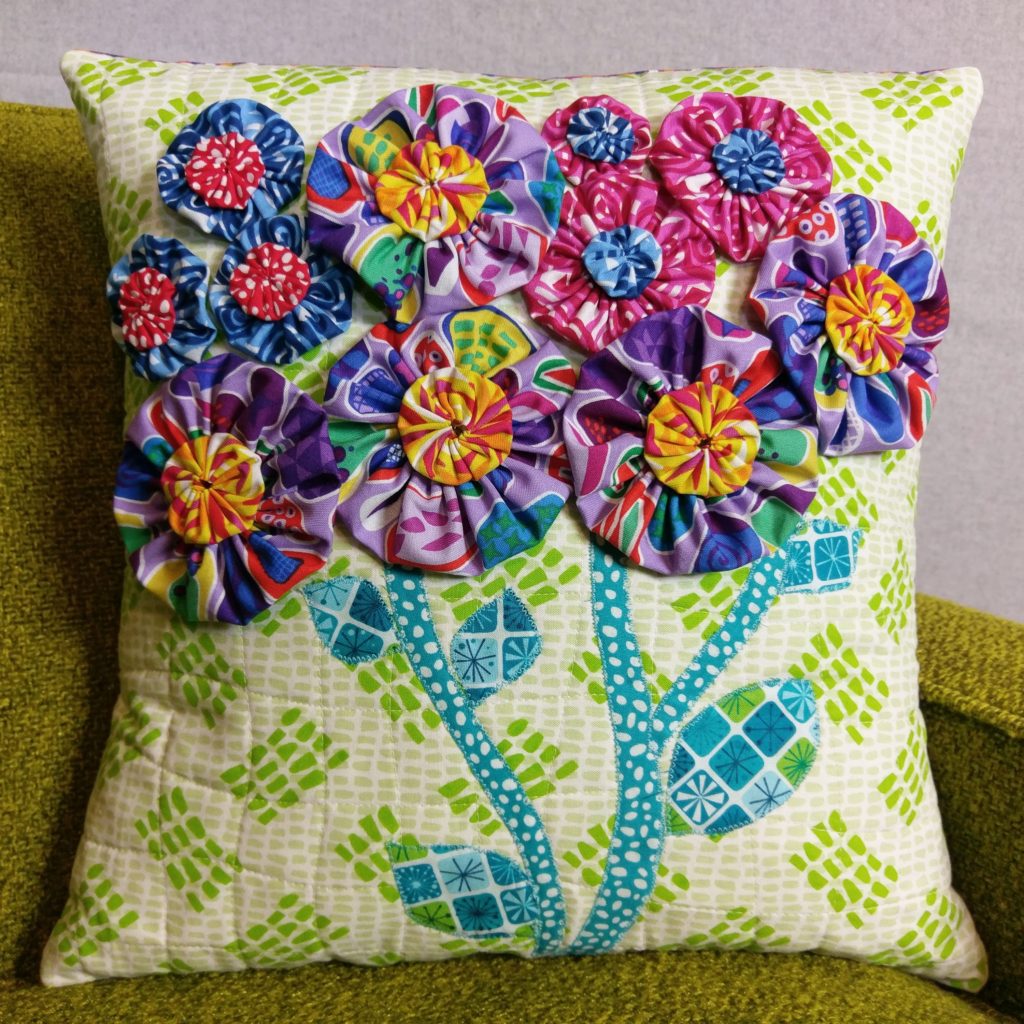
#mymodgarden pillow featuring Abstract Garden fabrics by Christa Watson for Benartex
Materials
1 pillow form (16″ or 18″ is a good size for this)
Fabric for the front of the pillow that is 2″ larger than your pillow form on all sides.
Fabric for the interior of the pillow front, 2″ larger than your pillow form on all sides.
(This will not be seen once the pillow is finished. It’s only for making the front quilted.)
Quilt batting 2″ larger than your pillow form on all sides.
Fabric for the envelope-style back of the pillow cut into 2 sections, each measuring:
the width of the pillow form + X"
x (1/2 the height of the form + 4")
X = either 1″ for a tight-fitting pillow or 2″ for a looser fitting pillow
Example for tight-fitting pillow:
If your pillow form = 16″ x 16″, then the width = 16″ and 1/2 the height = 8. 8 + 4 = 12
So, cut each piece of your back at 17″ x 12″
Fabric for the yo-yos, enough to yield:
5 circles @ 8″
2 circles @ 6″
3 circles @ 5″
6 circles @ 4″
3 circles @ 3″
Fabric for the stems and leaves. 1 or 2 10″ squares or the equivalent should do.
Making the Yo-Yos
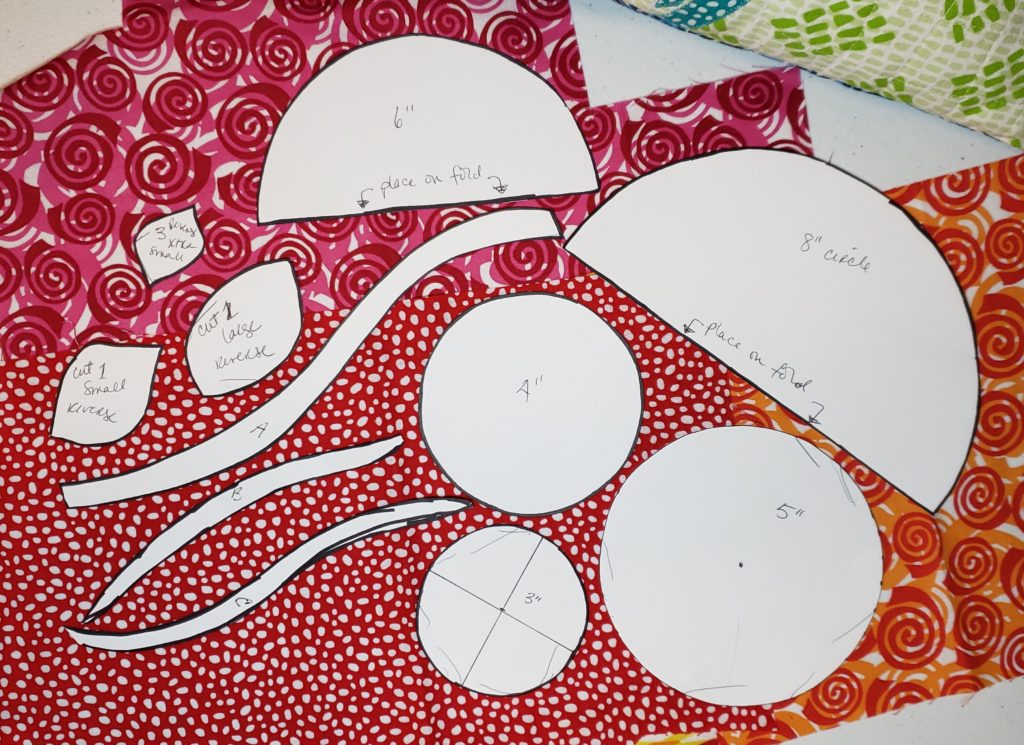
On a piece of card stock, measure out your circles. Make one 3″, one 4″, one 5″, one 6″, and one 8″. I like to use half circles placed on the fold for the 6″ and 8″ pieces and whole circles for the smaller ones. (You could also use anything round you have around your house that is approximately those sizes. A good rule of thumb to follow on size: each finished yo-yo will be generally 1/2 or a little less than 1/2 the size of the circle it started as.)
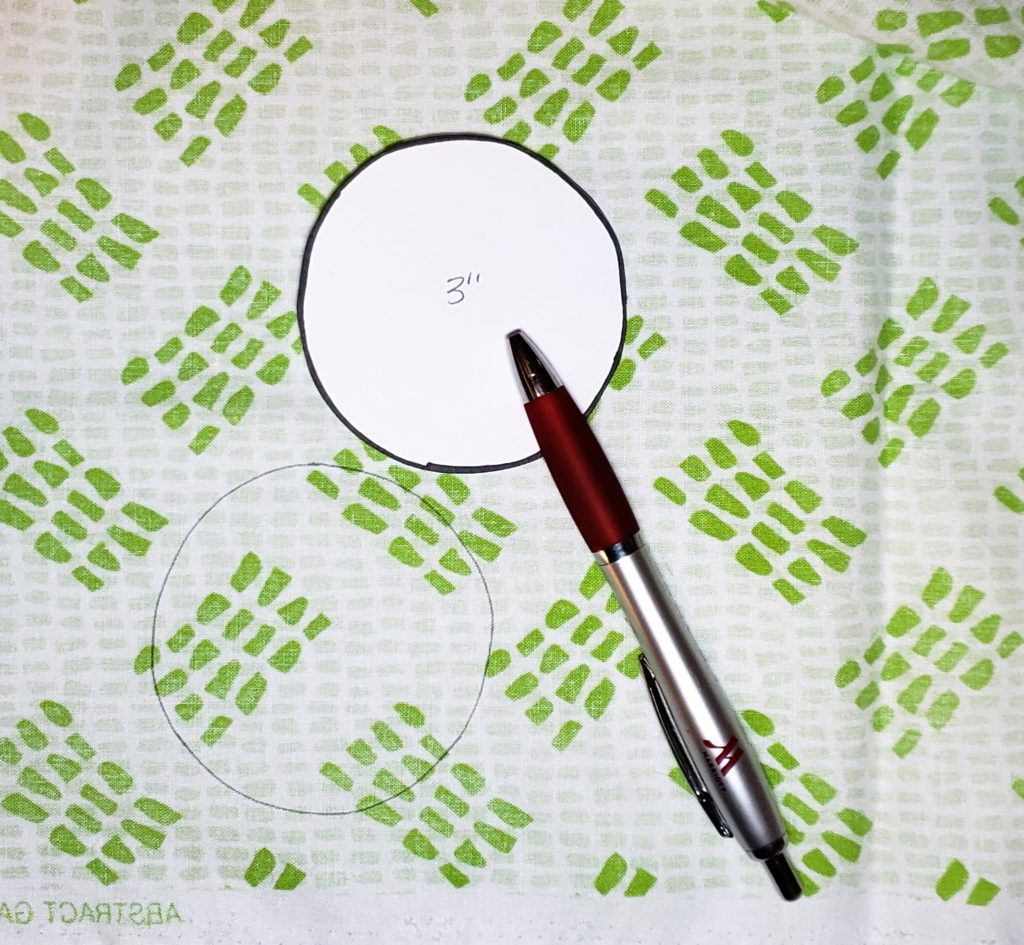
Trace your circles on the wrong side of your fabric and cut them out.
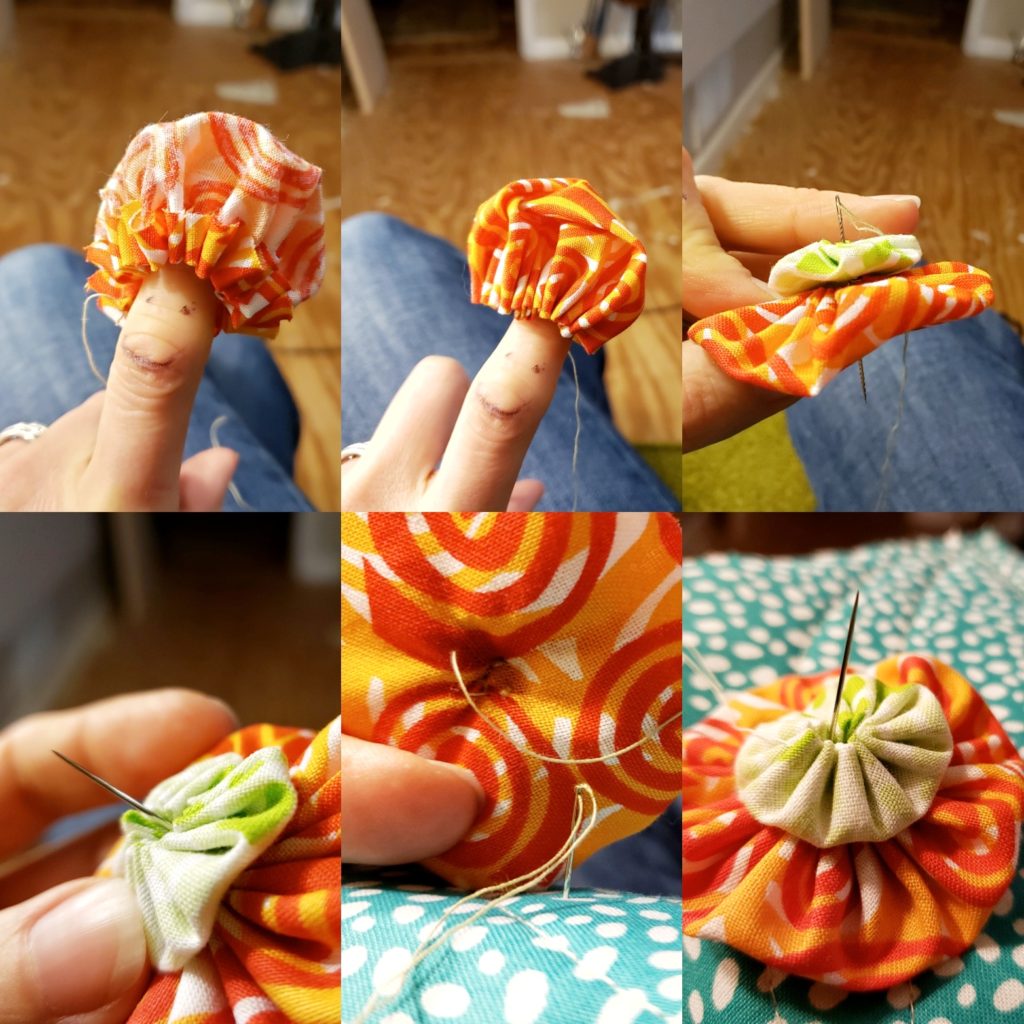
Make a quilter’s knot at the end of your thread. Fold the edge of the fabric circle in toward the wrong side of the fabric about 1/4″. Take a stitch about 1/8″ long, about 1/8″ away from the fold and back stitch once to lock the stitches. (p.s. your thread color doesn’t matter. you won’t see it when you’re finished.)
Make your way around the fabric circle with 1/4″ long (give or take) stitches that are about 1/8″ away from the fold. When you’ve come full circle (HA!), pull your thread slightly until your fabric resembles a shower cap.
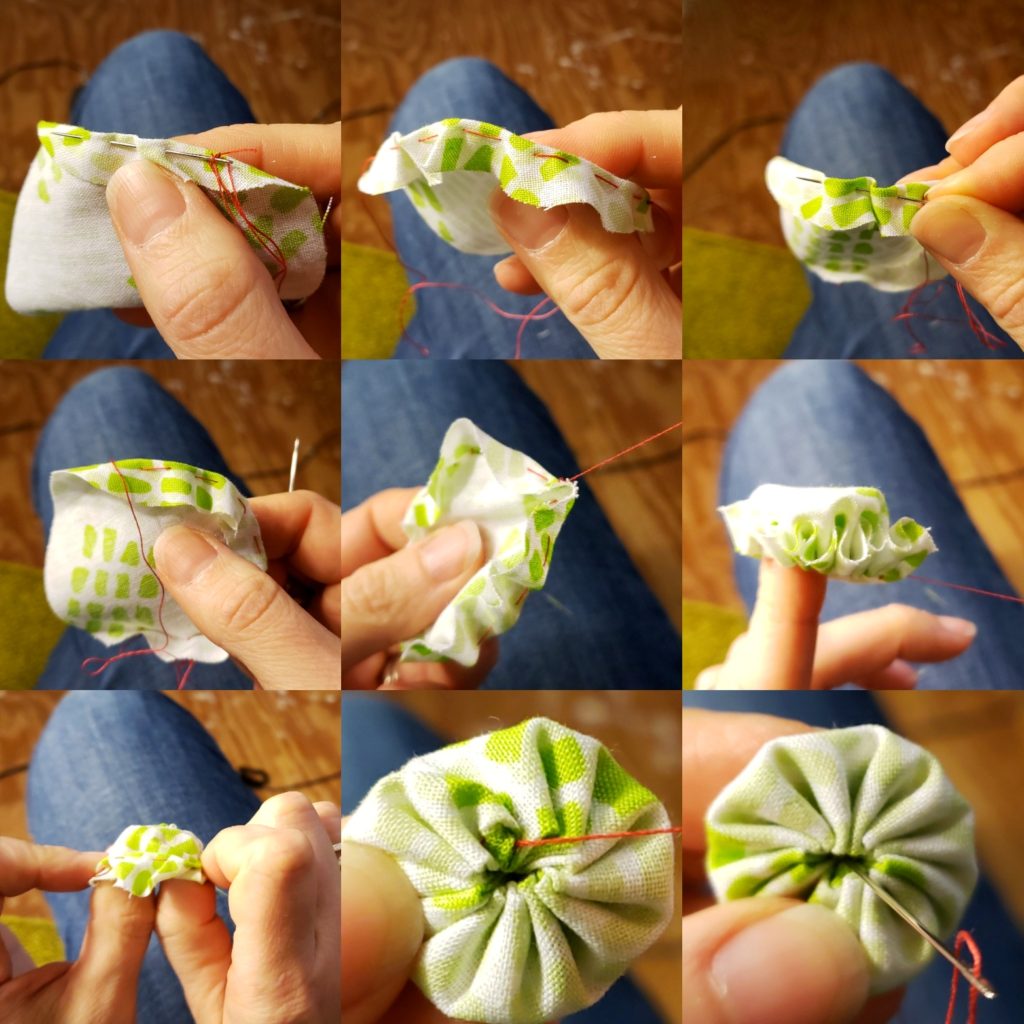
Turn the “shower cap” right side out, gently pull the thread, and work the center with your thumbs until you like the way the folds sit. Guide the needle down through the center of the yo-yo, and lock stitch and or knot to secure on the back.
Quilt your pillow top
Layer your pillow front with the quilt batting and interior fabric just like you would a quilt. Quilt the layers together. I used a wavy crosshatch that is super easy with a walking foot. Trim to 1″ larger than the pillow form for a tight-fitting pillow (i.e., if your pillow form is 16″, you’ll trim the top to be 17″ square [1/2″ on all sides]). If you want a looser fitting pillow (and you measured your back pieces accordingly), you’d trim the top to be 18″ in this example, giving 1″ on all sides.
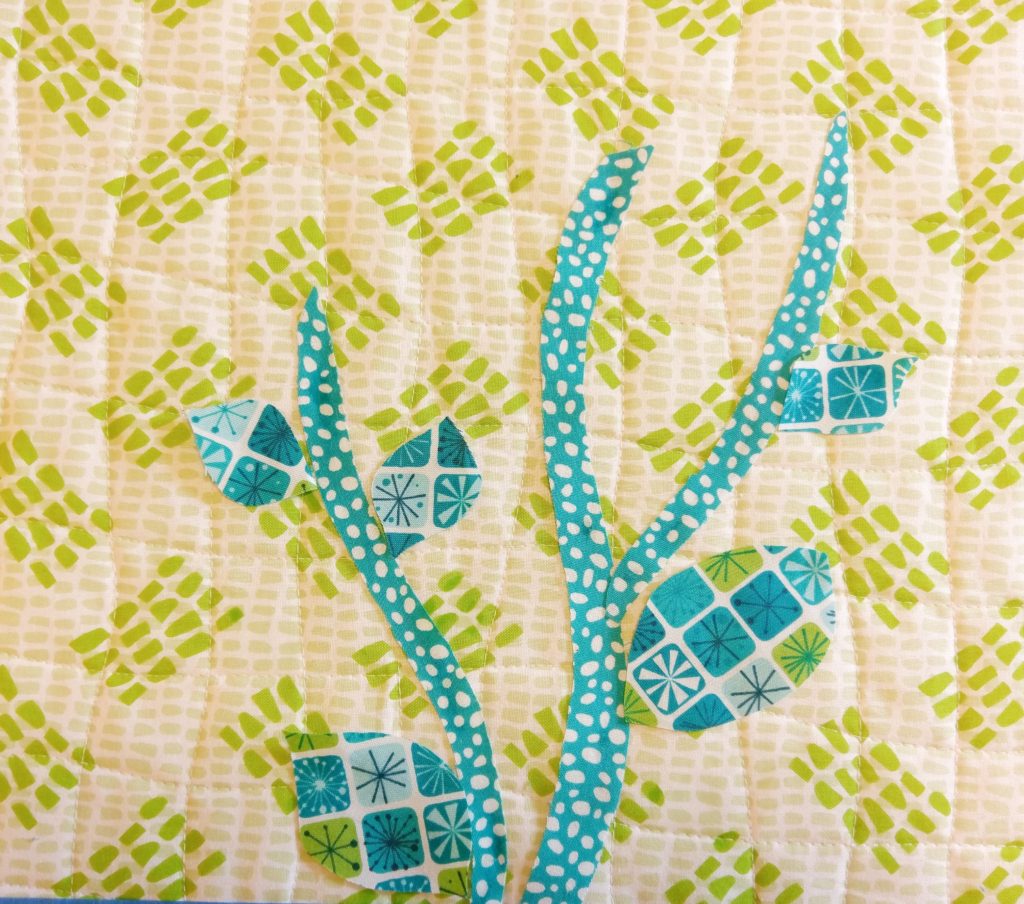
Cut out and attach the stems and leaves
Referring to the photo of the card stock templates above, draw out 3 wavy stems, each slightly different in size. Trace these in reverse on the wrong side of the fabric and cut out (trace in reverse because these will “bend” the opposite way when attached face up).
Using the same method, make 3 stylized leaf-shape templates of varying sizes. Trace and cut out your fabric leaves. I made 1 large, 1 small, and 3 extra small.
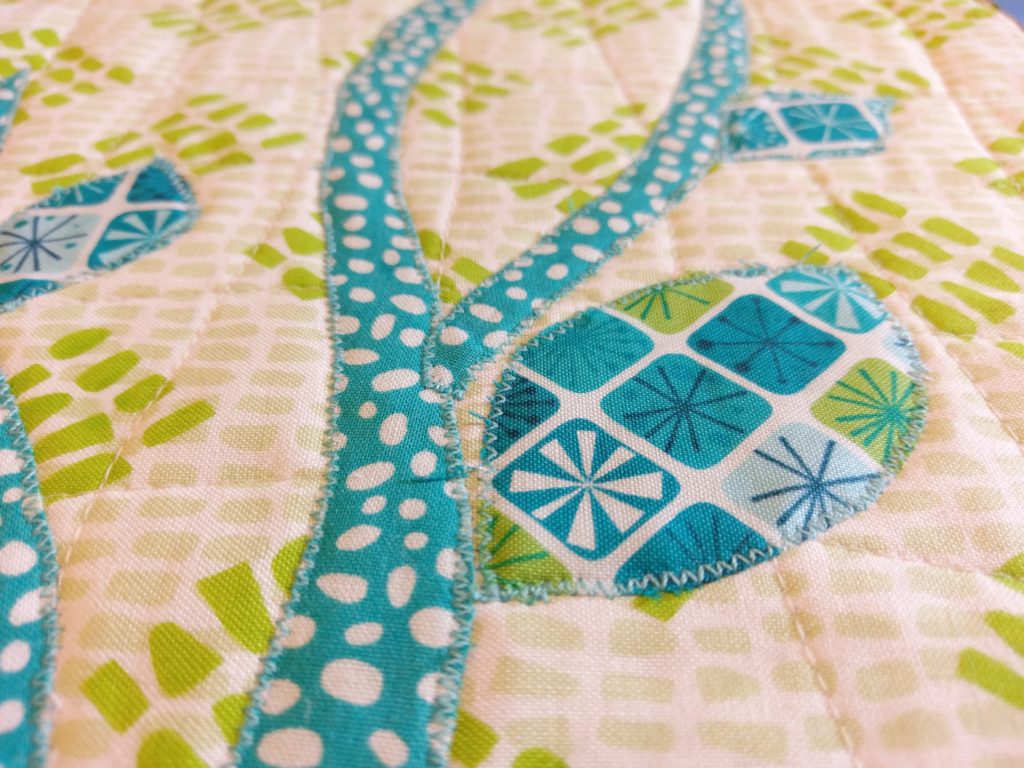
Glue, fuse, or pin your stems down, staying above the 1/2″ seam area at the bottom where you’ll sew the pillow together. Machine stitch them using a zig-zag or a blanket stitch. Then do the same with the leaves.
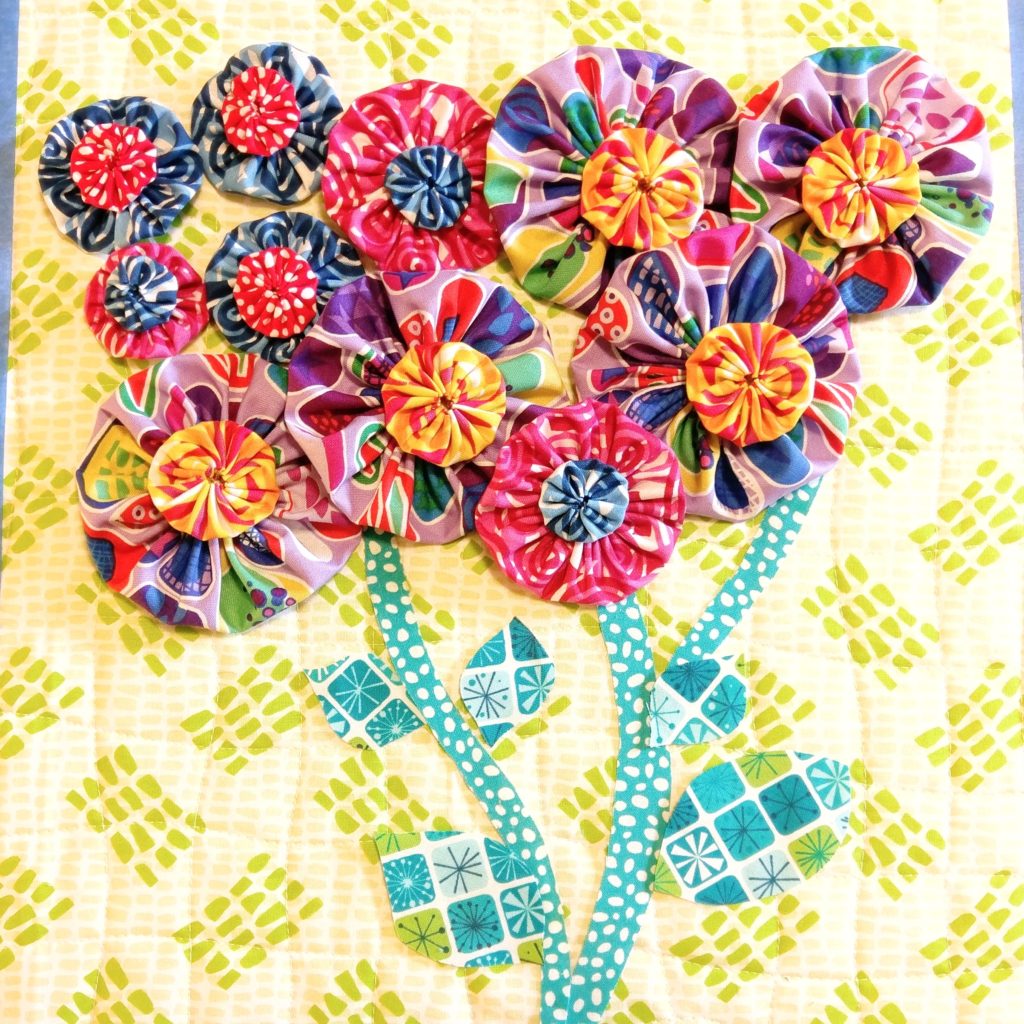
Layering and attaching the Yo-Yos
Ok, I couldn’t help the taking the shower cap thing a step further. HAHAHAHA!
Place a small yo-yo on a larger yo-yo and guide your needle up and down through the center a few times to attach them together. Secure your thread on the back. In this same method with the thread through the centers, attach the duo to the pillow front where you want it.
Sew the back of the pillow
Refer to the Materials section above for measurement guidance.
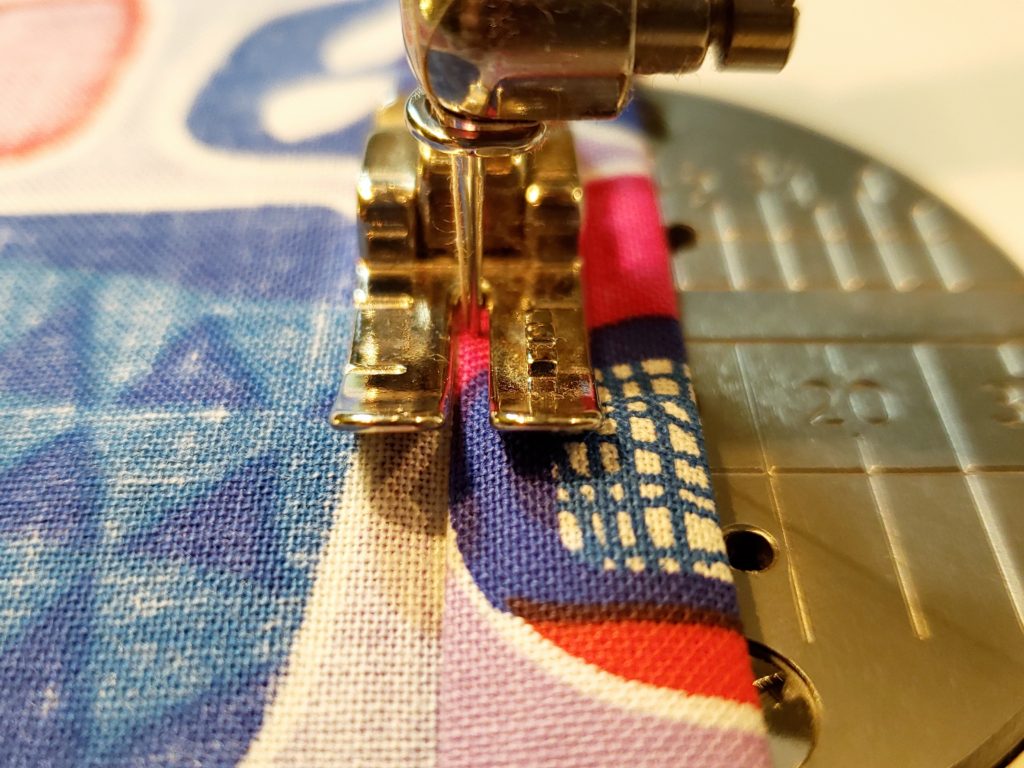
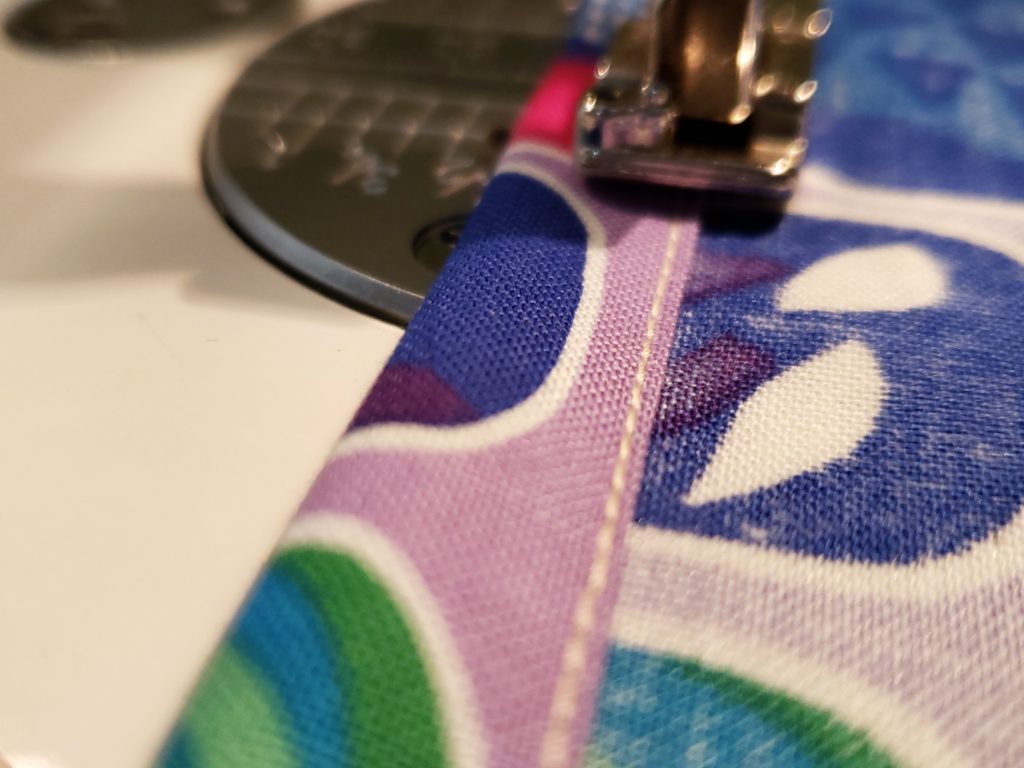
On one long side of each of the 2 back panels, fold over toward the wrong side of the fabric once at 3/8″ then again at 1/2″ so that the raw edge is encased. Sew this down close to the fold. Do try to get close to the fold. A big “lip” on the fold looks messy.
Put it all together
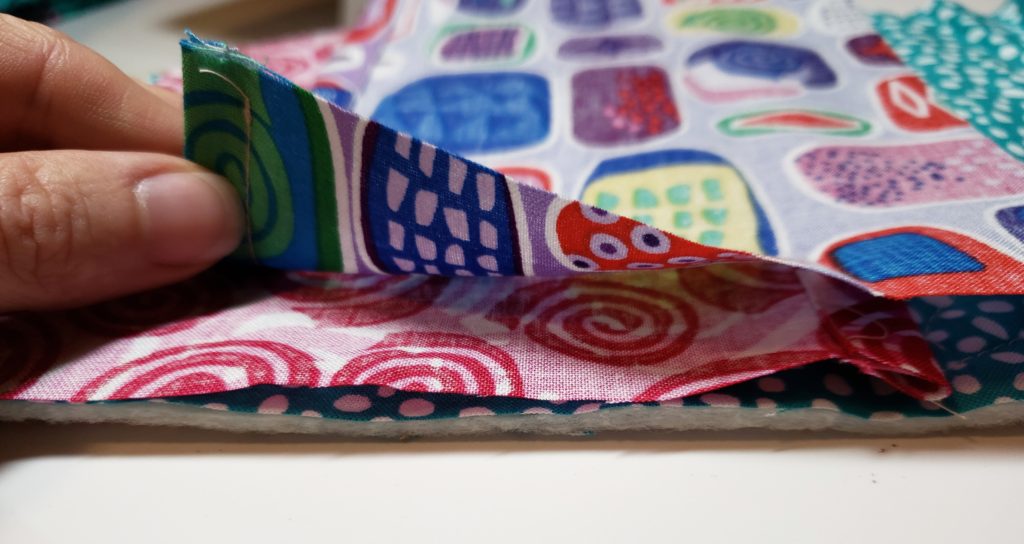
With the front of the pillow face (flowers) up, place the two pieces of the back panel right sides down on the front panel so that their seamed ends (hems) overlap each other in the center and their raw edges match the edges of the front panel.
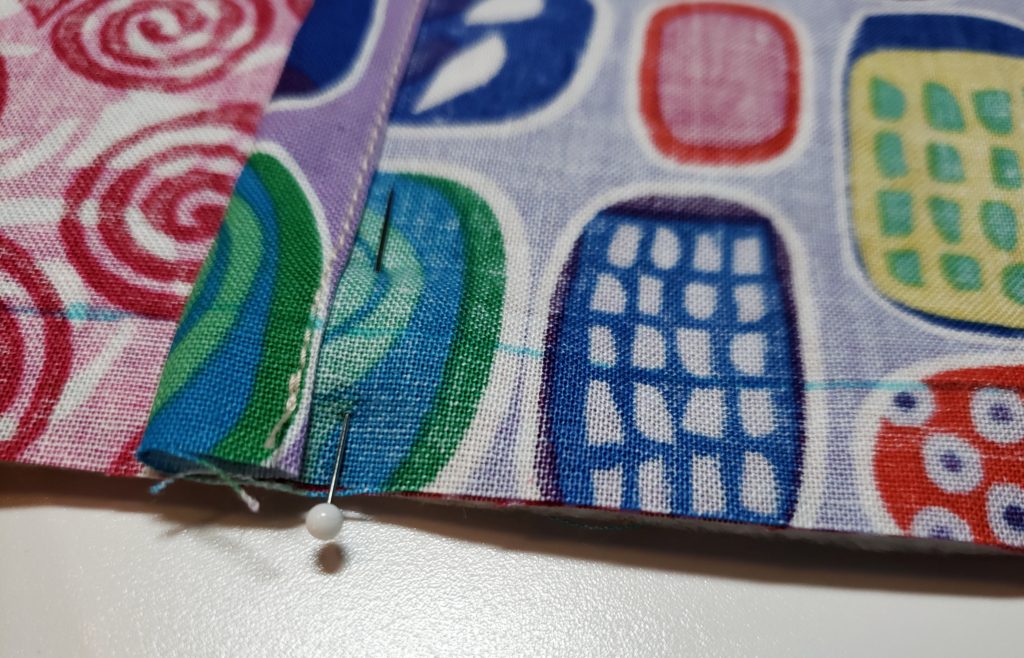
Pin all the way around, then mark 1/2″ all the way around. This is your sew line. You do not need to leave any opening because the two pieces of the back are the opening.
Back stitch at the corners and where the two back pieces overlap at their hems. You want these extra secure because you’ll be inserting a pillow form and tugging at them somewhat.
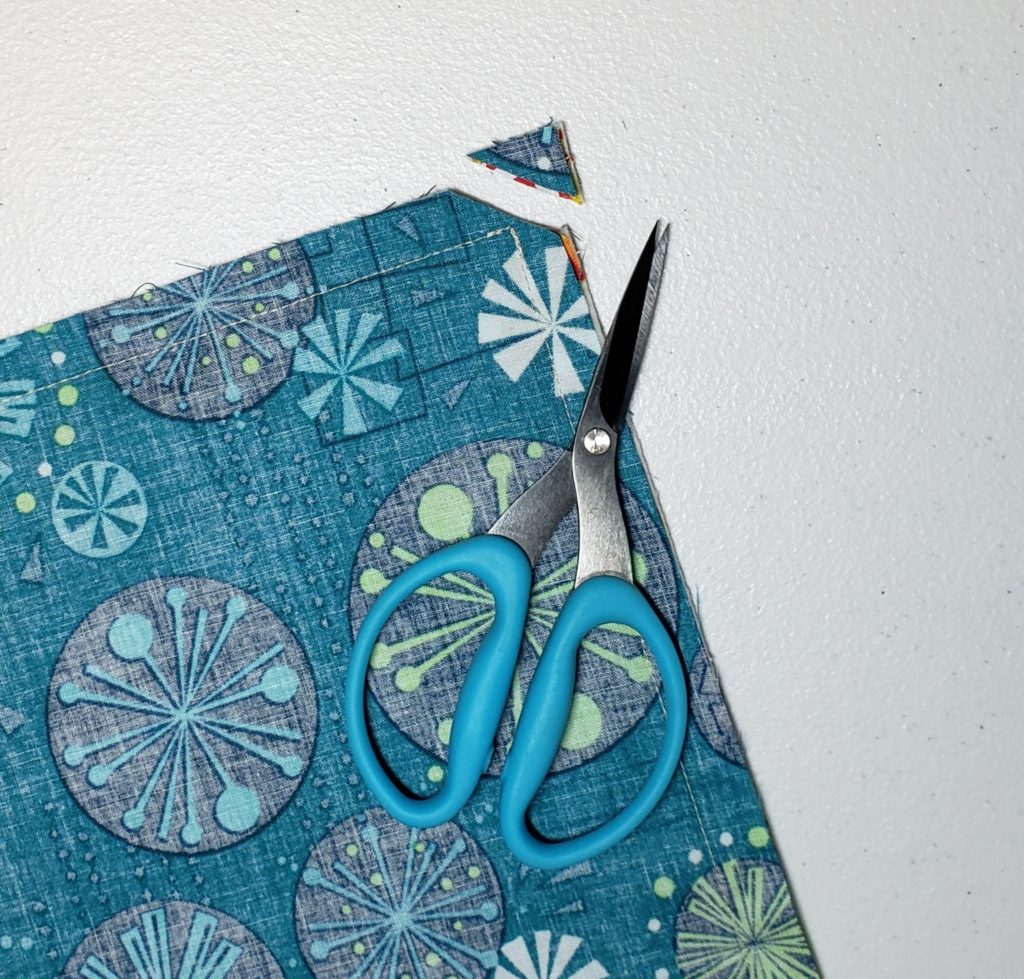
Trim the excess fabric at the corners before you turn the pillow case right side out. This will give you neat corners on your pillow.
Turn the case right side out, insert your pillow form, and enjoy your happy Mod Garden!!
Show us your Mod Garden using the hashtag #mymodgarden on Instagram and Facebook!
Happy Gardening,
Tara